Sunday 28 May 2023

The Final Front Ear

It’s been busy busy here at maison Broom just lately; I’ve played more games in the last two months than in the last two years - and finally got to meet, albeit over a computer screen, some of the great gamers I’ve corresponded with since I’ve been blogging. I have to say it knocks solo gaming into a cocked hat.

On the subject of cocked hats (watch out - sweet segue coming up) a close personal friend of the blog recently sent me a brand new copy of C&C Tricorne they claimed they had no need for, which was very generous of them indeed. Recalling how much I enjoy C&C in general I’ve decided to rebase my growing AWI forces to fit this rule set and my hexon hexes. It’s taken me over 40 years to settle on a figure scale that suits me and the last ten to realise I prefer simple rules and hexes or squares over open terrain and measuring. Doh. Fast learner eh!

Anywhoo… On the subject of finally getting my gaming sh*t together, I’ve also commenced play testing a Star Trek ship to ship combat rule set that’s been on my mental back burner and endlessly tinkered with since 2005 or thereabouts. 

Dad joke alert. The final front ear.

My wants were simple. No ticking off damage boxes, multiple ways to win, NO power management, no buckets of dice, no complicated tables, limited table clutter, customisable ships, use of tactics, no measuring, no turning arcs or game aid appliances, ships crews to be as important as the ships themselves and a dash of added burn card unpredictability. 

The Trek combat we see on screen does not of course follow realistic physics, and aspects of it are more like naval battles in the ocean. It was this ocean / naval connection that led me inevitably to a fantastic game system that I realised I’d been playing for a while and which I could easily co opt. I’m referring of course to Galleys and Galleons. I dropped the designer of G&G a line in 2017 to ensure he had no issues with me dicking about with it…and here we are six years later still in the testing stage. Lol.

In this post I’ll document the set up for a quick game of what I can only call « Galleys and Galleons….In Spaaaace. » and in the next one how the game itself went down…err…man. 

My setting for this whole shebang is the alternate so called Nu Trek of the 2009 JJ Abrams reboot, for the simple reason that I like the ships…and anyway Stew’s already got TNG totally locked down. Lol.

First off I drew a mission card for each of the protagonists, this gives a points limit that restricts how many or what type of vessels can be deployed. The Federation drew a catch the pigeon mission in which a stolen shuttlecraft and a hostage VIP need to be rescued from an asteroid field. The Romulan player (also me on this occasion) drew an I Spy mission where they have to scan an opposing vessel four times to pick up important intel.

The Federation player has this vessel:

The USS Eisenhower NCC-1890 (Constitution Class). The red bands on the base denote the hex sides through which it may fire its energy beam weapons.

And the Romulan player has this vessel:

The I.R.W. Varak (Corvid Class) Warbird.

All ships came from Nashstarshipyards at Shapeways and all the counters were from good old Warbases.

Both players randomly drew a one use burn card that can be deployed at any time in the game. Usually you’d keep these secret until deciding to play them, but this is show and tell time.

Each ship has a data card showing it’s points cost it’s quality and combat rating (as per G&G) and a set of icons denoting its major systems. Systems in various combinations are needed to operate the items listed under the special rules section. 

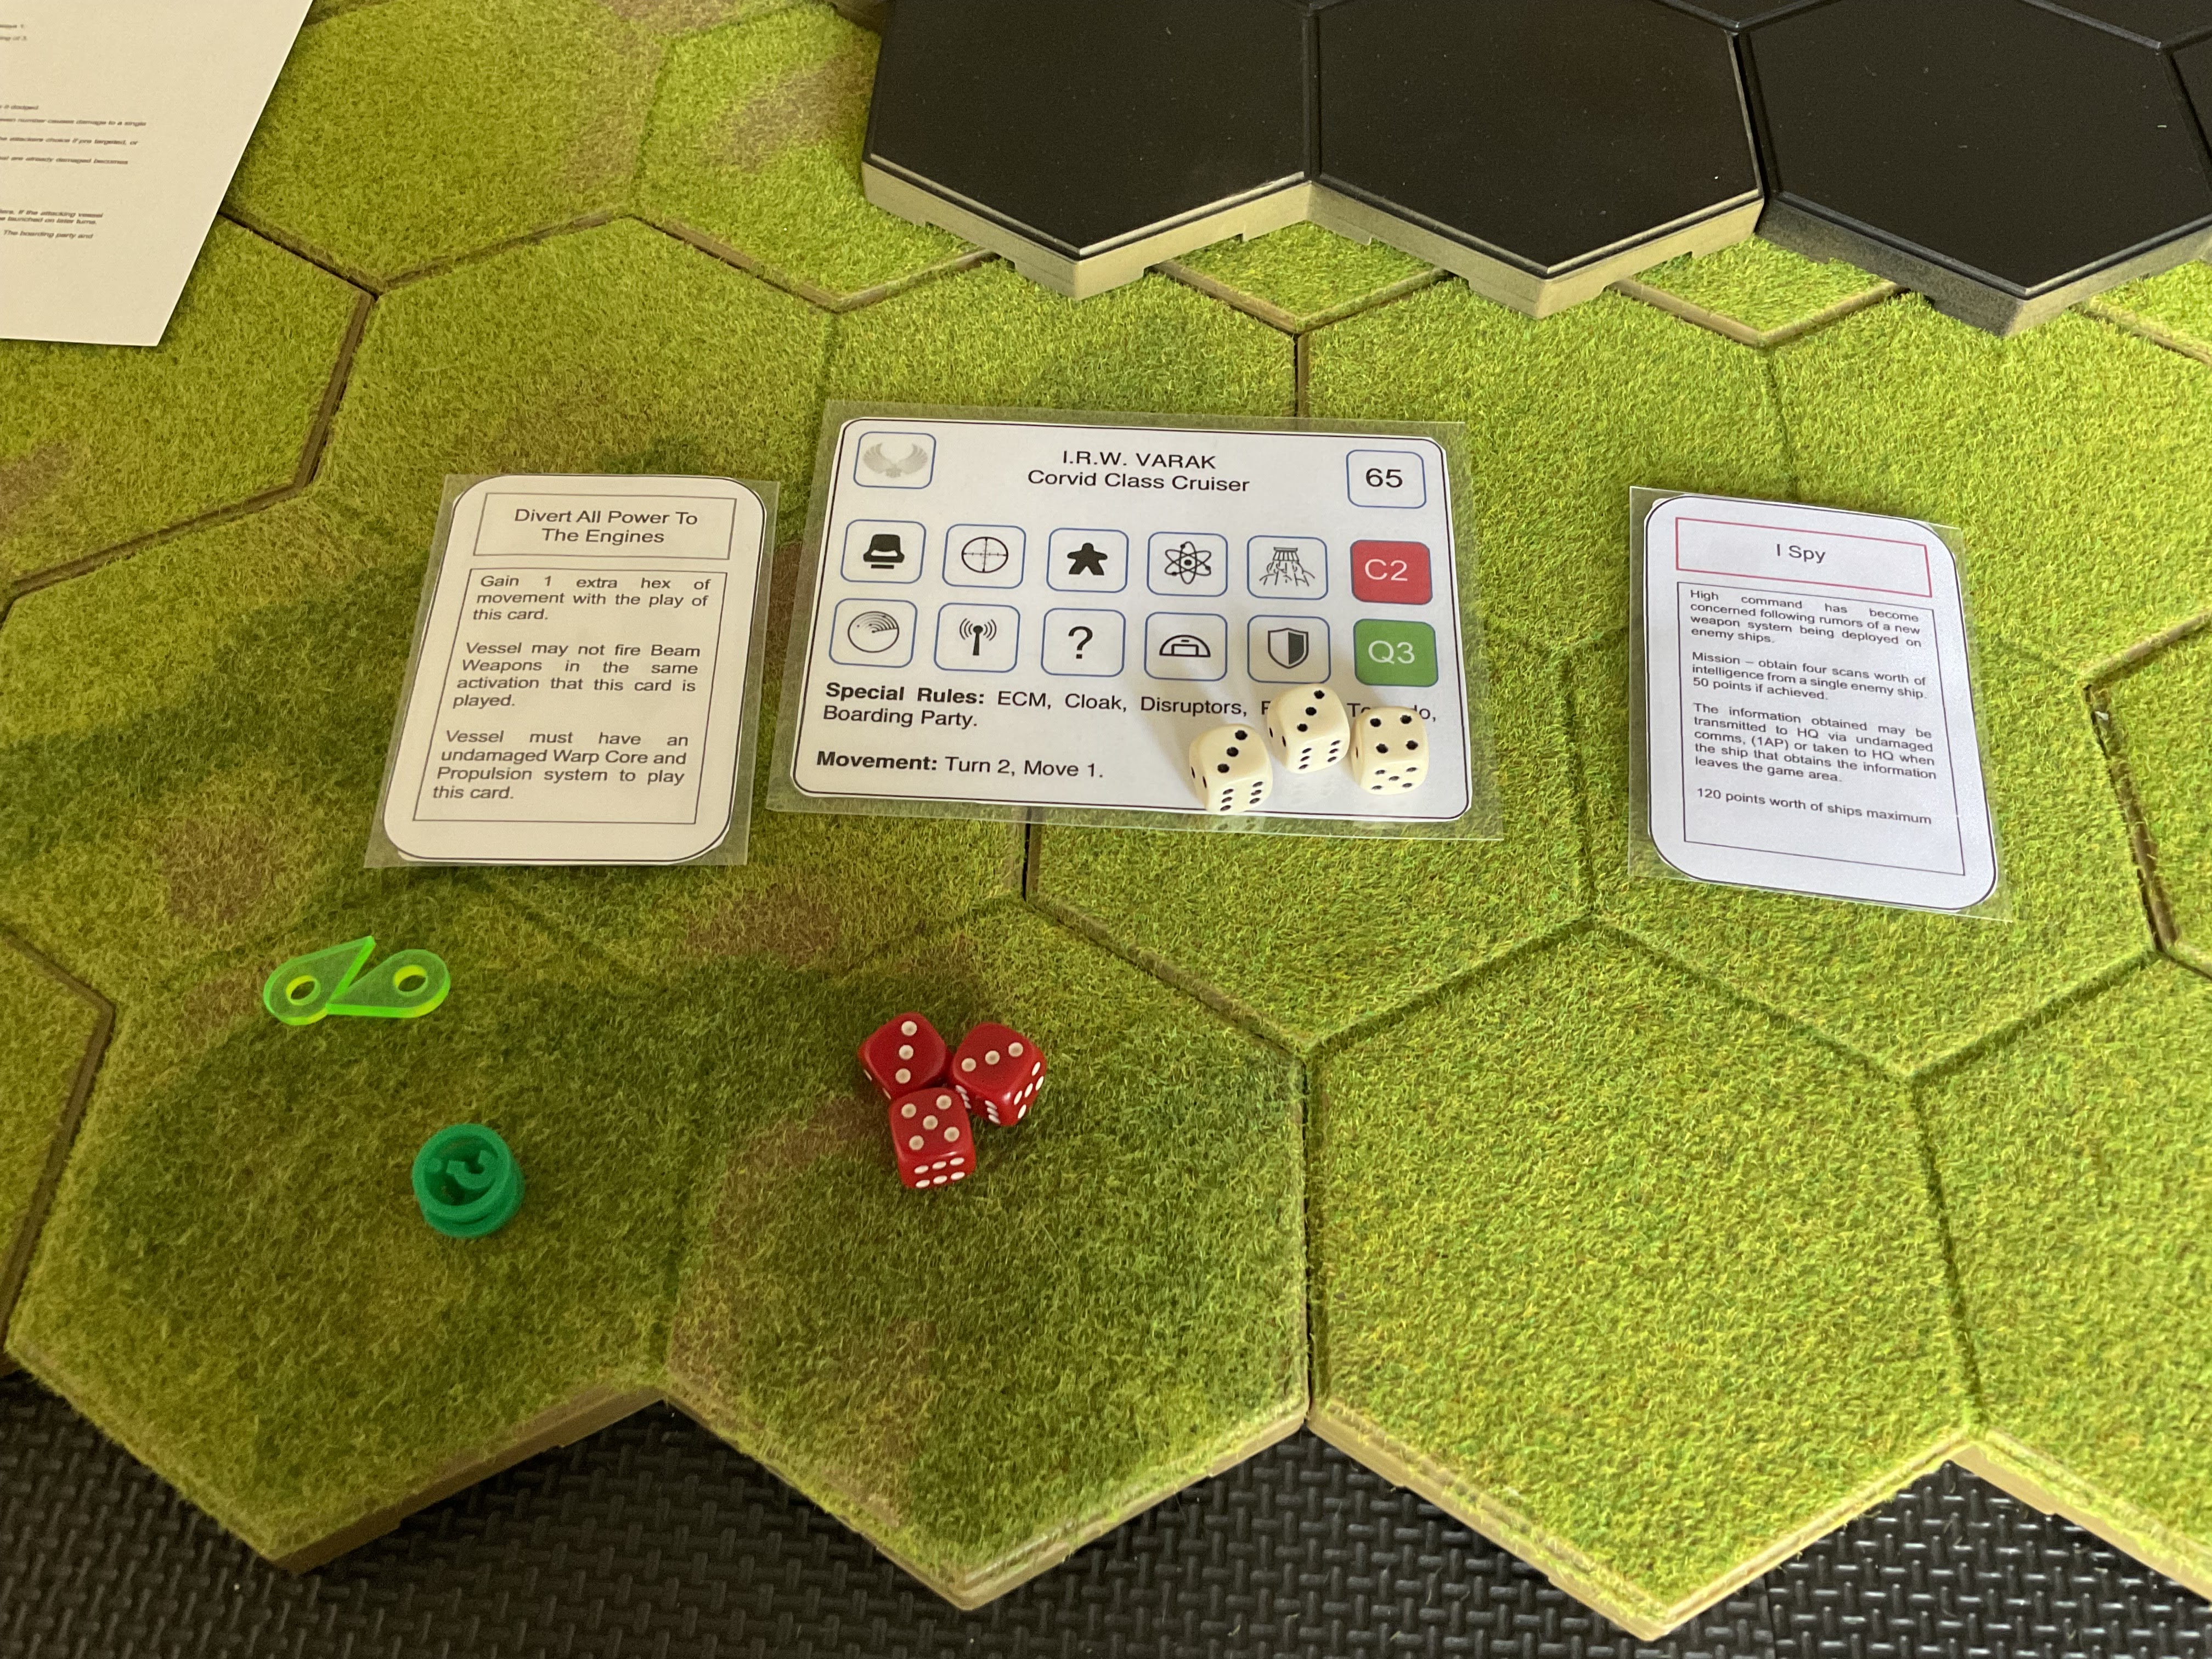
Each ship has three white dice and three red dice (which denote hull damage) though only three represent the vessel at any one time. White dice get replaced with red dice when the ship gets damaged. Three of these are rolled against a vessels Q (quality) rating every turn to see how many actions the vessel may perform. The green plastic ? Markers replace the vessel on the board when it cloaks, and the two teardrop acid green markers are plasma torpedo’s which after launch track their targets across the board for three turns - unlike energy beam combat which is instantaneous.

Not that any one is wondering, but those systems that are common to most vessels are bridge, weapons (all), crew, warp core (or equivalent energy producing doohickey), propulsion (warp and impulse), sensors, comms, hanger bay and shield generators. In addition to these the Varak has a cloak and the Eisenhower a large cargo bay. At the bottom of the card the movement potential of each vessel is listed. The Varak is slower but can turn more than the Eisenhower, while the Federation ship is faster overall.

There. Clear as mud. 

Think that lot was bad? I’m going to bore the arse off you with the next post. Lol. Feel free to skip it if its not your bag daddyo - 

I’ll be back to proper historical wargaming soon enough.

Toodleooh.

Saturday 6 May 2023

Argie bargie on the A41

Worked through my 1926 game today using rules that were designed for single model skirmish stuff using playing cards instead of dice. It’s fair to say that it went at a right old clip (done and dusted in an hour) so here’s the report - in glorious Broom battle picture library format.

The Birmingham Corporation Airforce’s only plane - met up with the ammunition convoy from Liverpool and proceeded to scout out the road ahead. 


The convoy wends its way south. The vehicles with grey bases are unable to travel cross country without the a real chance of serious damage or becoming bogged.


The DH4 spots movement at the road junction below. Inspector Knacker’s lads from ‘K’ Division saw the red tail band and they let fly with their new rifles. In a departure from Lambshead’s rules I determined the actual damage caused to machinery by using my acme damage dice (in yellow). The rozzers scored one hit and the damage dice revealed a piston icon, meaning an engine hit. The DH4 began to smoke but remained flyable…for now.

Engine trouble! A second hit on the engine will bring the DH4 down. But I can’t fly it off the board without counting it as a loss - which will affect morale. (The plane was a mixed blessing. The use of planes is not really covered in Lambshead’s rules so I freestlyed a bit. While it can move a long distance in a single turn (24inches) it is vulnerable to ground fire and obviously can’t just hover in place so needs at least one precious action point per turn to keep it moving forward in the air). 


The forces of reaction were not slow in responding. Spurred on by the overflight and the sound of approaching vehicles, the Fascist blue shirts fired up Carlotta the armored car (donated by Mussolini) and raced across the field flanking the main road. As they emerged from the edge of a copse they saw the Liverpudlian convoy stretched out along the road to their left. A quick burst of fire at the lead armoured car raked it from stem to stern, two shield icons showed hits against the Austin’s baked bean tin armour. 


…followed by a hit on one of the vehicles turrets that disabled its port side machine gun.


The convoy was forced to a halt as the twin turreted vehicle swerved off the road and crashed into a tree.

The convoy ground to a halt. Alarmed by the armoured cars sudden appearance and the destruction it had wrought, the drivers of the ammunition truck and the lorry behind it veered off the road in order to find cover - risking the possibility of immobilising themselves in the process. Two squads of Workers Factory Defence volunteers debussed from their…erm…busses…and raced towards the hedge line while at the tail end of the convoy the Lanchester armoured car hared off across the field and the ex soldiers travelling in the military truck prepared to take the fight to the fascists.


Exploiting a change in initiative the squad of Workers Defence Force soldiers rush the Ernhardt armoured car and hurl a bunch of grenades at it. The car survives intact but the Vickers machine gun barrel is badly damaged and it is unable to fire back.

The reds remaining car (a Lanchester) heads across the fields with a view to flanking the blocking forces position. Unseen, but in the background, the Liverpool militia sneak along the hedge line with a similar intention.

Unable to fire and in danger of being overwhelmed the crew of Carlotta get the hell out of Dodge.

The DH4 limps around for another pass and manages to drop one of its cooper bombs in the dug out occupied by a squad of the Rotary Club Fencibles. They are marked as “downed” for now (a mixture of killed, wounded or just taking cover) rendering them useless until their actual combat status is reassessed at the end of a turn. 

The plucky aviators are on the receiving end of another fusillade from the ‘K’ Division coppers and the observer slumps over his bomb rack, badly wounded. 
 
Alerted by the bombs explosion the Liverpudlian flanking forces close in.

The red militia swarm over the defences and defeat the squad of downed fencibles in close combat. (The civilian militia squads only sport the odd handgun or shotgun - their close range offensive potential mostly being an array of blunt instruments). Unfortunately a second group, unaffected  by the dropped bomb, are waiting for them.

The fencibles fire…and miss as the angry dockers storm the second redoubt. Rushing over in support a squadra of British Fascisti blue shirts get there just in time...

…to see the redoubt defenders fall under the iron bar wielding scousers. The blue shirts are armed with rifles AND a Lewis gun and they let rip without sparing their ammo. Even as the Liverpool lads fell under this fusillade their second squad, who’d been following close behind, stormed out from behind the parked lorry. The blue shirt Corporal traversed swiftly and caught the newcomers before they could get to grips with his squadra. Then a joker was drawn which ended the turn. (All turns are of unknowable length in these rules - being triggered by the draw of that card from either players pack). During the brief admin phase that followed both sides just scraped through their morale checks - the reds hampered by their repudiation of all officers (and thereby failing to receive any morale boost from one).

One of the only bits of useful advice my father ever gave me is hereby shown to be true. “Never charge a light machine gun armed only with a pipe wrench”, he once cautioned. Thanks Dad. Wise words indeed. There were no survivors from the two red militia squads. The Lanchester armoured car drove forward and while trying to keep a respectable distance they hosed the truck and the blue shirts with their Vickers. The blue shirts hit the dirt…


Stuck in their mobile biscuit tin, the crew of the Lanchester were so focussed on the British Fascisti that they failed to notice the heroes of ‘K’ Division sneaking up on their left. When the vehicle commander popped his head up from the turret hatch to see what damage they’d done, he got coshed on the noggin by PC 289.
The driver ignored the cries of “your nicked sunshine” and backed the Lanchester out of harms way at full speed
The retreat of the Lanchester gave the following rifle armed ex squaddies a clear field of fire. As the DH4 swooped overhead and the soldiers fired at the rozzers another joker was drawn and in the admin phase that followed it was the remaining Fascisti and the coppers that broke and ran. After “persuading” the traction engine driver to move his mobile road block the way was cleared for the ammunition convoy to continue into Brum. 

So a victory for the revolutionaries on this occasion and a salutary lesson that the government shouldn’t place all its of its faith in small irregular forces. From here on in the few remaining loyal army units were going to be needed to enforce order. 

Taken a little out of context the rules worked well, and produced a pretty satisfying narrative.

I’ll try another one of these sometime soon I think.

Toodleooh.