Showing posts with label AWI. Show all posts

Tuesday, 17 October 2023

AWI Campaign 9th July 1777 - The Last Hurrah


Huzzah for General Cummings and Parrott. Stout fellows!


The story so far. 


The British under General Parrott had discovered the American guns on the cliffs at Pringle Point but a stout defence from the untrained militia had fought them to a standstill. Overnight the British pulled back to regroup,  joined early on the 9th by the remnants of the dragoons and two fresh battalions of light bobs under general Sykes.


The American General Cummings had been surprised and relieved at his militias stout defence and even as the British pulled back his own reinforcements began to gather.


We take up the action sometime around turn 3. General Cummings and his continentals have arrived in the far right corner of the map, artillery following, and his fast moving riflemen outpacing the main column to take up positions at the edge of the woods.


General Parrott has retired from the previous battle at Pringles Point (top far left ish ) shadowed by two columns of Militia under General Motte. The previously mauled British dragoons swing around the hills (on the left) to join up with General Parrott. Meanwhile two battalions of light bobs finally make it to the dance under General Sykes. Supplies wise this encounter is pretty much shit or bust for the British. If they can cripple the Americans here they’ll still be able to march west and silence the now barely defended coastal artillery. 


First blood goes to General Parrott whose grenadiers turn on the shadowing American militia and inflict losses with a well timed volley to cover the unlimbering artillery.


The leading British light infantry engage in melee with the American riflemen in the woods but the advancing Continentals on their flank let loose a tremendous volley that shatters their confidence despite inflicting no real losses. Nerve broken they run. In Tricorne a flag rolled on a dice means the unit must retreat. The lights have Sykes with them and can ignore one flag but the other two means they have to retire two hexes. Sykes tests for being hit but perhaps because he leads from the back he turns out to be fine.


General Parrott’s artillery unlimber and fire at the shadowing militia. Casualties are inflicted and the militia have little choice but to try moving back out of range. Seeing that the Americans are now fully occupied by his artillery General Parrott moves his grenadiers into cover of the impassible terrain, intent on securing the central area of the map in order to bottle the Americans up in the one corner.


The light bobs under Sykes réorganise themselves after their fright and in the meantime the second battalion of lights advance towards the American rifles in the woods. Without the support of a senior officer to urge them on they are forced back by a fusillade of American rifle fire. Two flags rolled mean a retreat of two hexes and a morale check…


Which they fail! They needed to roll just 1 flag to pass and there are two flag symbols on each dice.


The battalion breaks and the demoralised men run from the battlefield. Oh the shame of it.


The American militia take more and more casualties from the British guns until they manage to retire out of range. This retirement unmasks the American artillery who begin a counter bombardment. After several turns the British gunners run, abandoning their damaged cannons. Fortunately the British dragoons finally show up. Should they charge the weak militia and brave the blizzard of fire before they can get to them or head off to support the grenadiers in the centre? Still nursing 2 out of 4 hits from the previous battle they choose the latter.


After reorganising, the remaining lights under Sykes begin a desultory long distance fire on the continentals but the results are poor and it becomes clear that must get in close to inflict any serious losses. Fortunately General Parrott with his grenadiers and dragoons come to the same conclusion and draw some of the American fire as they all advance into the centre at the same time.


The dragoons charge ahead of the grenadiers but take the brunt of the American firepower. They too break and run (or should that be gallop ?) from the field.


Finally generals Parrott and Sykes arrive at the enemy positions. But it’s General Cummings and General Parrott who face off as the continentals and the grenadiers go hand to hand.


Disaster. The grenadiers pile in - their blood up and the continentals are routed with heavy casualties. Somehow surviving the assault General Cummings takes shelter amongst the nearby riflemen.

General Parrot’s men turn to strike the riflemen in the tree line as a bonus attack but fail to dislodge them. The American militia rush to plug the gap in the pass left by the continentals.


Général Sykes men put the riflemen to the sword, chasing them through the woods. As they flee a final volley cuts more of them down and makes the survivors scatter.


Still mounted General Cummings tries to halt his fleeing men by waving his sword around in an encouraging manner but he too is cut down in the hail of fire. Shot in the back by the dastardly British!


Two crossed sabres in ranged fire = K I A. In melee only 1 is required.


Alas poor Cummings I knew him well. Sort of. 


Perhaps annoyed at Sykes’ success the grenadiers turned on the militia plugging the gap in the terrain and made short work of them. General Motte fled back to his second militia battalion.


The breaking militia unmasked the American artillery who swiftly loaded canister and readied for hand to hand combat. As the British grenadiers raced towards the gunners General Parrott riding bravely at their head the cannon let loose with a mighty roar.


General Parrott had written to his wife the day before the battle expressing his intent to be posted back to Sir Henry Clinton’s staff…and in this matter at least he got his wish. 


Shame he had to be posted back in several different parcels. Lol. 


Both sides had reached exhaustion. Sykes, knowing that his remaining troops were badly needed back at Coldstream and aware that American Provincials were somewhere to his rear (on the strategic map) called off the assault, while General Motte led the mauled remnants of his force back to the safety of the fortifications and the coastal cannon.


The loss of both Generals and the poor state of the remaining forces led this campaign i thought to a natural conclusion, though the matter of the greater strategic issue still needed to be resolved.


There were twelve ships in the British supply convoy and I intended that the coastal artillery would get a crack at them as they sailed past. I felt a 1D6 roll against each ship with a 6 reflecting its destruction would suffice for want of anything better. 


So I rolled this bucketful (apologies for the very dark image).


And found that not a single ship was sunk!


So where does that leave things?


General Cummings succeeded in his brief to protect the coastal artillery - albeit at the cost of his life, and General Parrott’s loss was also not in vain since the convoy got through and Sir Henry Clinton’s offensive could take place as planned.


Both of my generals were great sports and kept an old man thoroughly entertained as they struggled with the vagaries of fate. 


Mistakes were made and sometimes the generals made strange choices but it’s easy to criticise when you are aware of the complete picture…and they’re not.


Observations.


The use of a hexed map for the players to move their units over was a poor decision. It was overly complex and a point to point one would have been far better. Lesson learned. 


Each player was given 28 points pre game with which to purchase supplies, units, intelligence, seaborne landings etc. General Parrott spent heavily on high quality units, full intelligence and a seaborne landing but only 4 of his 28 points on supplies. Given that each turn his forces would use 1 point of supplies just marching in the field and 1 if any battle occurred this was a major error.  Fortunately for the British a lucky random event provided a few supplies from HQ which kept him going just long enough to get within striking distance of his objective. Just. The British had 1 unit of supplies left on the day of the final battle. This might help explain the mad mid game panic of promissory notes and his attempted slave rebellion. Lol. Displaying perhaps a little too much caution General Parrott had two good quality line units that never moved the whole game and whose only activity was to build defences in place. I suspect their presence would have swung the battle of Pringle Point in his favour. 


Ah well could’ve would’ve should’ve and all that.


General Cummings probably had less of a difficult job overall, but his reliance on cheap militia units nearly cost him dear. In his total command only the 1 unit of continentals and a battalion of rifles could be considered reliable. The good General spent heavily on supplies and expended lots of them building the large earthen fort that protected the militia and the guns at Pringle Point. Diplomatically he was very sure footed, showing steel in his dealings with the deserters and compassion with the errant farmers taking supplies to General Parrott. 


Should he have diverted a battalion of militia to protect the settlers from the Cherokee raiders? Mmmm. Maybe. Maybe not. Their absence wasn’t to prove decisive so any criticism is a little harsh. 


Despite the many positives I’ve listed here we have to remember that he still got shot in the back as his men ran away. So there’s that I suppose. Lol. 


Overall the campaign was quite short with only three battles - but in fairness I designed it that way so that it didn’t turn into a ball ache for all concerned. Hopefully it kept the two participants and you dear reader, amused?


Toodleooh


Saturday, 7 October 2023

AWI Campaign 8th July 1777. The battle of Pringles Point.

You won’t be surprised to learn that I was actually eating Pringles when I needed to find a name for the site of the forthcoming battle. While other crisp like comestibles are obviously available for inspiration I felt that the clash on Smokey Bacon hill, or the encounter at Monster Munch heights didn’t sound quite so good somehow.

Ahem… where was I? 

Ahh yes.

General Parrott had finally reached the location of the main American coastal battery at Pringles Point, but with a force only half the size that he required. Supplies were running low and the two battalions of light infantry under Sykes that were meant to have joined him had become delayed and disorganised by an unmapped area of marshland blocking their route to the rendezvous.

Hopes however were still high in the British camp when the newly arrived dragoons took up position to the right of the grenadiers and their attached artillery. Despite the extensive fortifications (that General Cummings had been building since game start) there only appeared to be a couple of battalions of militia and artillery defending the coastal artillery position - surely a walk in the park for the British elite.

General Parrott took up position at the head of the dragoons and they cantered off across the left flank while the grenadiers marched about and made a bit of a noise to fix the enemies attention.

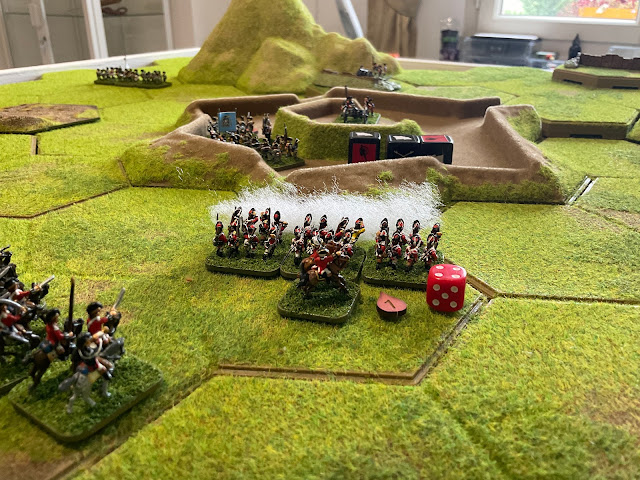
The dragoons were pulled up short by a volley from the American militia in the half moon defences ahead and an unexpectedly productive cannonade from the artillery on the hill at the back of the field. (Receiving intelligence that the British were closing in on the coastal guns General Cummings had instructed his subordinate Motte to redeploy the battery to fire inland). Their extra firepower was a major help.


Suffering 50% casualties the dragoons fell back a good distance, but were eventually rallied by the exhortations of brave General Parrott, who cursed them for cowards and demanded that they stand and do duty by their King. (I’m aware, through exposure to Family Guy that this might have another meaning for an American audience - so please feel free to snigger).


Seeing the flank attack fail the grenadiers began an oblique advance on the fortification, taking shot and shell from the defenders as they walked forward in line. They took casualties but their elite status allowed them to shrug off the losses and keep going.

In an effort to add encouragement General Parrott left the shaky dragoons and joined the grenadiers - urging them on (with presumably a lot of sword waving and huzzahs).  Shamed into providing some back up the dragoons started to follow but fell foul of another brutal cannonade that hit them in the flank.


Lacking Parrott’s steadying influence they broke under the fire and fled the field.
(Note I was going to declare a loss for the British and a withdrawal if two of the three units took 50% casualties. At this point it was very close. 2 losses on the dragoons and 1 on the grenadiers).

The only plus point for General Parrott so far was that his artillery crew had driven the militia out of the half moon defences - though they suffered no casualties and eventually rallied themselves when out of range.

Reaching the lea of the defences the grenadiers could no longer be shot at by the enemy cannon and their own disciplined fire drove the militia out of the fort. Left alone in the redoubt the remaining American gun crew were cut down as the grenadiers scaled the central defences. 


The American militia were quick to break, but quick to rally again. Now outside of the main fortification it was their turn to find cover in the lea of the defences. Pot shots forced the victorious grenadiers to retire from the exposed central position and by the close of turn 9 a curious stalemate had settled over the battlefield.

As dusk fell I drew matters to a conclusion. The British had failed to destroy the coastal battery (on this occasion) and worried that they might lose their elite grenadiers by forcing matters to a conclusion they held back. The Americans for their part faced a similar dilemma. While they seemed to have saved the day the militia had limited staying power and there was no guarantee that a frontal assault on the grenadiers would go their way. As night fell the last of the gunfire petered out. Both sides were at an impasse.

I gave both players the opportunity to withdraw during the night, but it was the British that eventually slipped away under the cover of darkness. 

Messengers galloped forth from both camps, rallying whatever forces could be mustered before dawn. 

Somewhere nearby a fat lady was getting ready to sing.

The British had been given a bloody nose at Pringles Point but even though their supplies were running critically low they were not beaten yet. Could they still pull something out of the bag?

Toodleooh for now.

Friday, 29 September 2023

AWI campaign update 4th - 7th July 1777

This post covers the events in my ongoing mini AWI campaign. 

American General Cummings has been tasked with defending coastal artillery intended to interdict British supplies sailing around the Owl Head Peninsula to Coldstream.

His opponent, General Parrott has been tasked with destroying the coastal guns in order that supplies essential to operations in the theatre are received intact.

The British troops had enjoyed overwhelming success at the first encounter with the Americans, causing the rebels to flee with heavy losses after a surprise encounter on the O’Higgins trail.


Now read on…

General Cummings was a bit taken aback by the sudden and violent overthrow of his three militia battalions at the hands of General Parrott’s grenadiers but in one sense at least the militia’s mission had proved a partial success - they had located the advancing British army.

By contrast General Parrott, if you’ll excuse the avian analogy, was now “cock a hoop”. The rebels had scattered like chaff in the wind before him. If that was the best the Americans could do he clearly had little to fear.

The issuing of promissory notes to prop up his supply shortfall has been mentioned in the previous post and was an out of the box bit of sophistry that I couldn’t help but applaud. What I never reckoned on however was the interplay with other random game events because on the next turn the Americans got “spies” who revealed the British players last instructions to me as the GM; the instruction to issue the promissory notes.

The narrative I subsequently presented to Graham as the American supremo, was that his patrols had intercepted a number of farmers travelling south with wagon loads of supplies, clutching Chris’s promissory notes. He was asked if he wanted to string them up after taking the supplies or just let them go. Mindful of the farmers inherent loyalist sympathies, he decided to let them go…and pay them out of his own pocket for the supplies he’d taken. 

Masterful. 

His clemency went a long way to shaking the farmers unthinking support for the crown - though worse was to follow for poor old Chris since the farmers at Arrowhead were now prepared to sell supplies to the Americans for hard cash instead of bits of paper. This was also the point at which his decision to arm the friendly Cherokee came back to bite him in the ass.

Having been informed that his promissory notes and supplies would not be waiting for him at Trappers Landing after all, General Parrott changed his plans to head there and instead ordered his men directly west towards the expected position of the coastal guns he’d been tasked with locating and destroying. 

News of the militias rough handling by the grenadiers quickly spread to the sympathetic trappers and hunters who had a trading outpost down at Trappers Landing. Incensed at the actions of the British troops, many of the backwoodsmen  decamped to swell the militias depleted ranks.

The militia bested by Chris’s grenadiers had been heading west and had managed to stay just ahead of the British as reinforcements started to trickle in. By the 5th July dire news reached the Americans from Arrowhead - which had come under attack from the newly armed Cherokee. The supplies they were about to sell to the Americans had been destroyed. What could be done? General Cummings immediatly split the retiring militia group into two, allowing the weakest battalion to head up to Arrowhead to protect the villagers and the two remaining militia groups to retire towards the fortifications that his subordinate (General Motte) had been building around the coastal guns. 

Good news for the Americans came later on the 5th - the random events die roll had produced “reinforcements”. A battalion of South Carolina Provincial infantry had been ferried across the river from the south  and were disembarking at Trappers landing. As they disembarked and began to march north, fresh sails could be seen arriving in the estuary. British ships!

Frustrated by the militia slipping away and the failure of his promissory note issue, General Parrott decided to issue a proclamation to the slaves working on the settlers farms. If they escaped their masters and brought supplies to Trappers Landing they would be granted their freedom and protected by the crown.

On the surface this seemed like a great ploy. It would pay back the settlers for their disloyalty, and potentially still bring in some of the supplies his force badly needed. 

Once again the dice Gods punished Chris. The farms at Arrowhead were small and though slaves were held there, there weren’t as many of them as he’d imagined. The attacks by the Cherokee had hardened the farmers hearts and the arrival of the militia sent to protect the settlement helped stifle any idea of a slave revolt. 

At this point, when I thought fate couldn’t get any worse for the British, it naturally did.

As part of the initial campaign information the players were both given a bit of background on their two immediate subordinates. General Parrott had this pair:

Colonel Montague Mountjoy Sykes (2nd Baronet of Lulworth), and Lt Col Parsifal Matthews (KB).

The back story for Sykes was that he socially outranked Parrott but had been passed over for command of the current expedition and was not a happy bunny. None of that would have mattered a jot had Chris’s next random event roll not been “command friction” which took him off down a whole other rabbit hole.

Chris was advised that Sykes had been outraged by the decision to free the slaves and he’d written to Sir Henry Clinton the theatre commander to complain. Clinton duly despatched a note to general Parrott telling him that the proclamation must be rescinded immediatly. How did Chris want to deal with such an unruly subordinate I asked? Ignore it? Ride over to the mans location and confront him? Maybe he wanted to suggest something else?

What Chris didn’t know was that riding over to confront the chap had a decision tree outcome of a major argument potentially leading to a duel. Lol. Ever the diplomat, Chris actually chose to write a brilliant letter to Sykes putting him in his place and gently reaffirming who was in charge. It seemed to do the trick because further orders were subsequently followed, (though to General Parrott’s letter there was ominously no reply).

As the British pressed ever westward one of their pre game cunning plans finally came to fruition as the 33rd infantry disembarked from navy frigates at Trappers Landing. Even this coup de main was slightly tarnished by the discovery that the American provincial reinforcements had landed in the same spot the turn before and though already marching away he knew they could still turn to present an imminent threat. Rather than striking north, General Parrott ordered his new arrivals to start building defences.

General Cummings was all too aware that the British were closing in on the coastal gun positions and he ordered all his dispersed sub commands to move towards this location in order to defend them. His random event Die Roll produced “terrain” allowing him to choose a strategic map hex and add either fortifications, swamps or make it impassable. Graham chose swamps and nominated a hex he thought the British might attempt to traverse on their march.

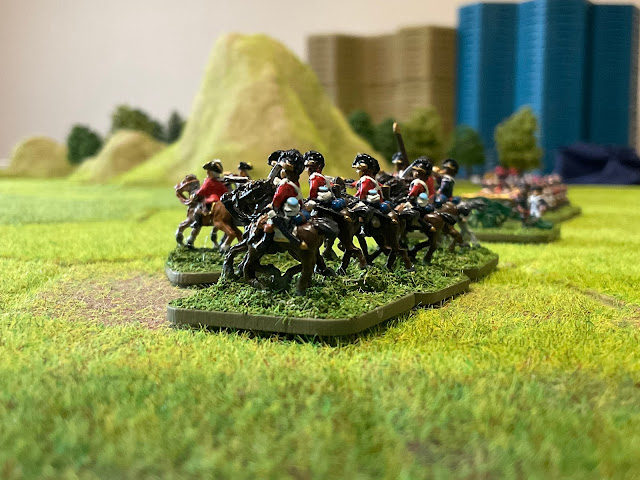
On the 7th - General Parrott’s luck seemed to change. The 16th Dragoons arrived through a “reinforcement” random event adding to his forces in the nick of time.

The 16th Dragoons arrive in the nick of time.

Ordering his reinforced column of grenadiers artillery and dragoons forward to the coast he was unaware that Sykes with two elite battalions of light bobs had been delayed after stumbling into the uncharted marshland. Approaching the guns at Pringles Point, General Parrott found himself having to go it alone.

Defending the guns against Parrott’s grenadiers, artillery and dragoons were two battalions of militia a battery of guns and the coastal artillery which General Motte had ordered to be dragged around to face the oncoming attackers. Even ensconced behind their earthen barricades it was going to be touch and go. 

The bulk of the Americans behind their earthwork defences. A second militia battalion occupies a horse shoe redoubt out of sight to the right.

Could Parrott drive the rebels off and nullify the threat to the approaching British convoy of supply ships?

The grenadiers prepare to advance on the rebel fortifications. 


We’ll find out shortly.

Todleooh.