Rather than throw him in at the deep end with a single battle I’ve been working incrementally through my rules with Jérémie, so that he can get a handle on some of the concepts and ask questions in a none competitive environment. Fortunately the arrival of son number 2 and his family of locusts gave me the opportunity to test things out on another newb who at least spoke the same language. Sort of.
We settled on a different scenario to the one I’d set up for the last post in which there was no set defender / attacker - just a have at it sort of thing. The usual win conditions (eliminate enemy leader or 5 units) was applied and I present the proceedings in Broom Battle Picture Library format below.
In an effort to aid comprehension a lot more counters were used than is normal. Not sure if they help matters, but hey ho.
 |
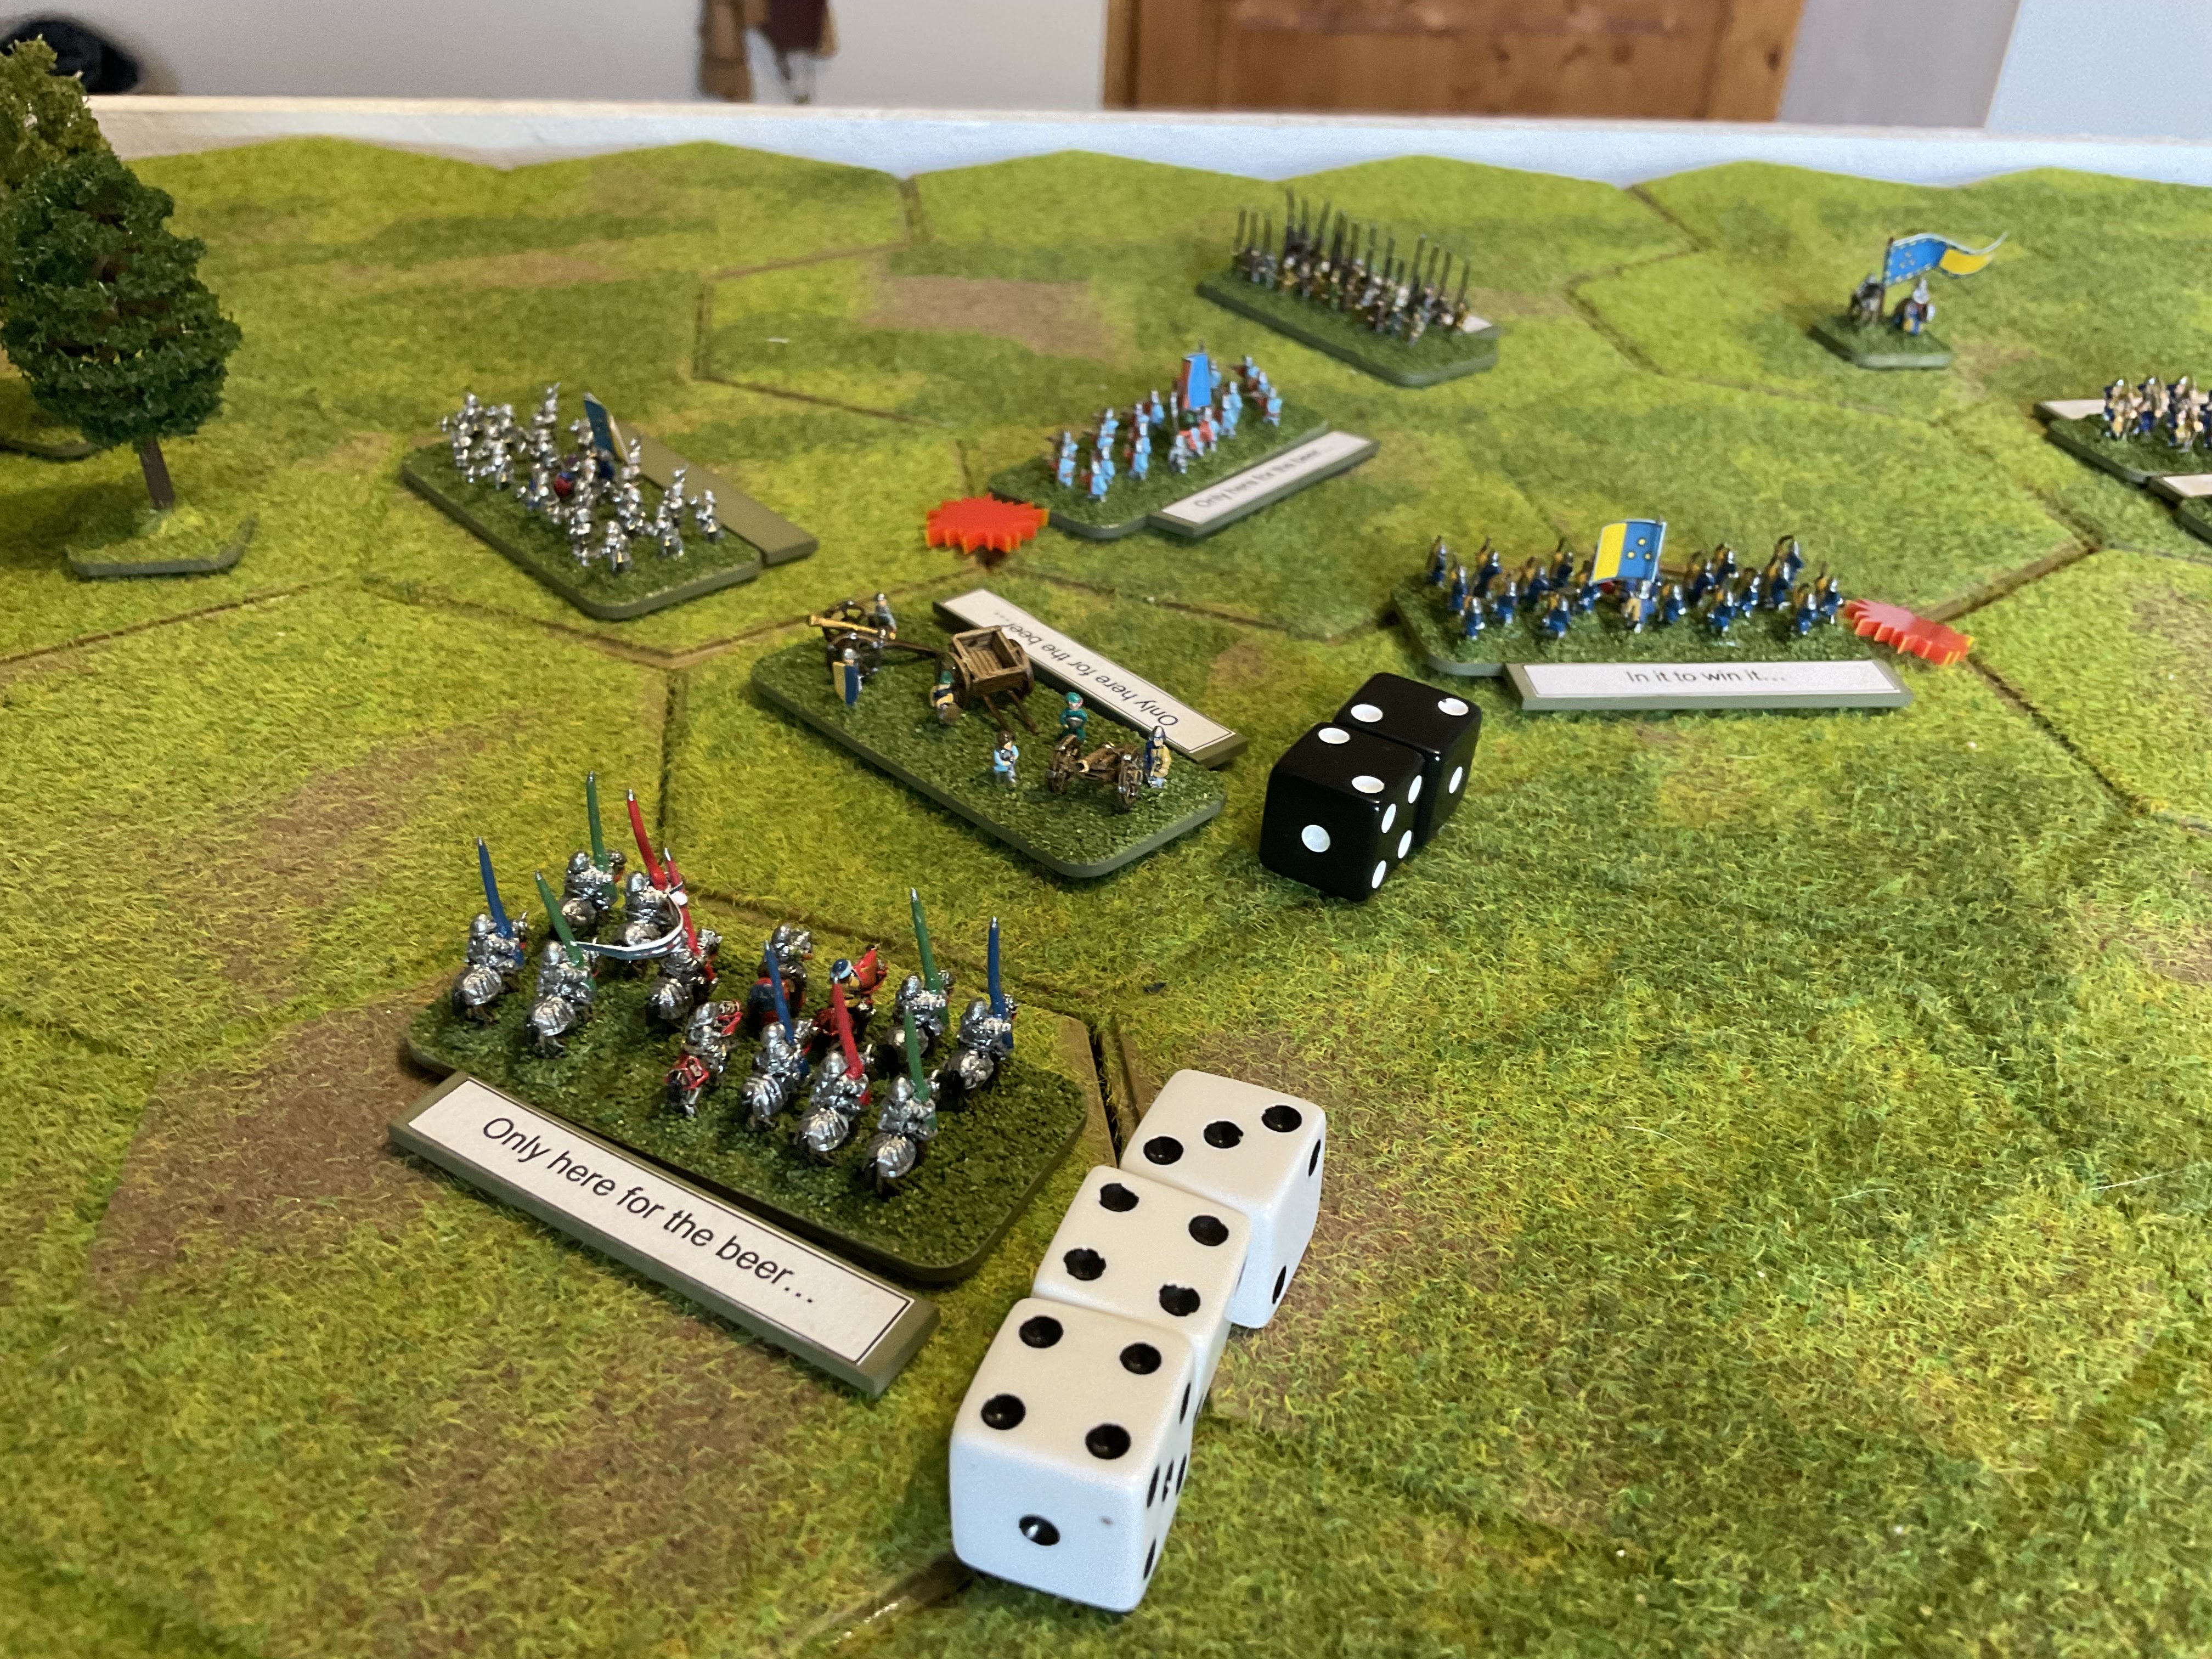
| Okay so I’ve taken on the role of Hubert Mowbray (Yorkist) medieval “mushy pays” magnate and occasional Lord of Tipton - to the right of the picture. The fruit of my loins is acting as Crispin Walpole Earl of Dudley (Lancastrian) on the left. We both have fifteen units and our fight only represents the outcome on the far right flank (from my perspective) of a much larger battle where the unseen centre and left wing portions of the main armies are similarly engaged. Turn 1 sees me get the initiative and I roll 9 command points with the two black dice - which is pretty respectable. |
 |
| Individual unit quality is hidden to both players at game start, apart from hexes adjacent to the leader and his command stand. Poor old Lord Mowbury (me) was surprised to discover that most of his nearby men were remarkably lukewarm about the forthcoming scuffle and the only guys actually “up for it” were the gaggle of peasant spearmen recruited from the nearby town. (We’ll assume they have a lot to lose should the Lancastrian forces win and go on the rampage in their farms and homes). |
 |
| I ordered 9 of my units to move - companies of archers moving forward into bow range (1-5), knights out onto the right flank to counter his knights (7) and Lord Mowbury (8) moving leftwards to see for himself how enthused his leftmost billmen actually were. |
 |
| The lad rolled well too - 8 command points are issued to his men. On his right flank three companies of billmen advance towards my repositioning archers. Is he actually attacking or is he using them as arrow magnets in order to save his own bowmen? I wasn’t sure. Unhelpfully out of shot, Crispin’s knights move off to the left and prepare to hit my flank. |
 |
| At the end of turn 1 is the joint missile fire round. All missile troops that are in range, arc, and l.o.s. are marked with a yellow counter. The guy with the initiative (me) fires first with one unit then fire passes to the other player until all potential units have shot. Apart from “ready to leg it” units, archery and missile fire cannot kill off a target stand merely disorganise it and / or force them to retreat. In a disorganised or retreating state (with their backs to the enemy) they are extremely vulnerable to melee - not to mention costly and time consuming to reorganise and turn back around to fight. |
 |
I decided to concentrate my archers on the most dangerous of the advancing enemy. The net result of a whole lotta bow twanging was that the most motivated of Crispin’s Lancastrian billmen became thoroughly disorganised (red counter) turned their backs on the Yorkists and started heading back towards their own lines. The remaining lower quality troops still attempting to advance looked on in disgust.
|
 |
| At the start of turn 2 the Lancastrians got the initiative and would move first. Crispin heads to the left to discover how the rest of his troops are feeling. Light horse move around to the right flank to back up any breakthrough the billmen make and the heavier knights continue to swing out on the right. |
 |
| My (Yorkist) response to the advancing billmen was to pull my archers out of harms way and deploy them back behind my own foot troops. Unfortunately this would mean they wouldn’t be able to fire at the end of the turn, so I bunged some crossbows and a spare bunch of arrow jockeys into the centre of the field to hit the advancing enemy foot in the flank. At the back of the field and just in shot both groups of knights collide in a head on charge. |
 |
| And then things started to go wrong…for me. My knights were “ready to leg it” so I didn’t hold out much hope but they did manage to disorganise the Lancastrians before fleeing the field. |
 |
| Even though my crossbow chaps had made it into cover behind some hedges they were now the sole target still in range of the Lancastrian archers. A hailstorm of arrows fell on them, disorganising them and sending them scurrying to the rear. The only plus point was that a company of Lancastrian archers rolled snake eyes, indicating they were running low on arrows. (Minus modifier when firing and it costs 1 precious command point to resupply them). |
 |
| By turn 3 I’d started to steady the Yorkist ship a little. My archers were now safely back behind the billmen and ready to recommence firing (on the left), my disorganised crossbows were retreating out of range (in the centre of the field) and light artillery, spears and men at arms were moving over to plug the hole in the flank left by the disappearing knights. |
 |
| View from my Yorkist right flank. Disorganised crossbowmen stream past the front of the advancing peasant spears. Way off in the distance lurks my nemesis. |
 |
My reconstituted line of bowmen managed to stall the hesitant advance of the Lancastrian billmen (not shown) and I was pretty chuffed…until this happened.
Having recovered some sense of organisation Crispin’s knights thundered into my redeploying right wing. The light field guns were still setting up when they were entirely overrun. Because they were destroyed the knights moved into the ex gunners hex - which meant they then hit the disorganised crossbowmen in the flank. |
 |
With predictable results. The remains of the crossbowmen fled the field in the same manner as my knights and gunners.
The slightly frazzled Lancastrian knights advanced again but this time they came face to face with my most motivated of units…the peasant spearmen! The spears took a battering and were forced to retreat but the knackered knights had had enough and melted away like mist. By this point in the battle he’d killed off 4 of my units and I’d only destroyed 2 of his.
|
 |
| When the Lancastrian billmen began to fall back I pushed my own forward (right of picture). Unfortunately a previously disorganised Yorkist company became the target of the Lancastrian archers… |
 |
| …With predictable results. Two fresh hits (6’s on the black dice) on top of their already disorganised status made them run for it - becoming my fifth and game losing loss. Bugger. To top it off I’d previously placed my good self (Lord Mowbury) in the same hex as the shattered unit and a leader check die roll revealed that I’d been badly wounded in the upper body and carried from the field. The early end to the battle on our wing led to a dice modifier which showed the Lancastrian’s had beaten the Yorkists across the entire battlefield. Sometimes you just can’t catch a break. |
Observations
The rules worked extremely well. Units that made it across the zone swept by massed archer fire usually made contact in a disorganised state and suffered as a consequence in subsequent melees. The knights had a big impact but proved brittle in the long run. Morale played a key part, peasant spearmen with the “we could be heroes” trait managed to stop the Lancastrian cavalry in their tracks. So all good.
Neither of us spent enough time moving our blocks of foot forward into contact despite having enough command points to achieve it. Apart from the foray of the Lancastrian knights we both became bogged down in archery duels and getting units back into an organised state before attempting to advance. I’ll try to avoid that next time and see how things go. I might just have to accept that they’re not going to be in the best shape when they eventually get across the killing ground.
Next game will involve some additional rules like improving the morale of a unit mid battle.
Toodleooh.


Super looking game, table and miniatures and a very entertaining read too. Your rules worked well and seemed to give a great game even if you were on the end of a bit of a beating!
ReplyDeleteCheers Donnie, I’m glad you managed to follow proceedings. Yes I got a drubbing, but I’ll work on my tactics a bit for next time. TBH the outcome was a forgone conclusion…it’s a family tradition that I spend ages building two armies…then my son comes along and beats me handsomely…while his brood empties the fridge. lol,
DeleteThe Knights (here for the beer) came good! Are you the bloodline of Lord Mowbury of Faulty Towers acclaim? If so I call you and claim my five pounds 🙂
ReplyDeleteLol. I’m of the West Midlands Mowbury’s actually…but there’s a crisp white fiver on its way to you in the post!
DeleteBollocks! That is Fawlty Towers ….. not faulty!!!
ReplyDeleteYou might have been right first time… only you would have got the reference though.
DeleteStill letting the kids beat you eh? It’s not good for them if you let it go on too long 😉
ReplyDeleteGlad the rules are working out so well. I like the idea of not knowing the spirit of the troops until you are in contact.
Chris/Nundanket
Chris it doesn’t matter what I do - the outcome is always the same. I only play against him now just to get it out of the way.
DeleteFun sounding game, well not for you but at least it was pretty?
ReplyDeleteBest Iain caveadsum1471
Cheers Iain - as pretty as teeny tiny 6mm can be I suppose.
DeleteGame looks great and your rules sound interesting, as given by your post-game report. Hosting, playing, and winning is a difficult trifecta to pull off.
ReplyDeleteIt sure is Jon - as you would know only too well!
DeleteLooked great and at least your son is interested in playing toy soldiers with you, neither of my kids are the least bit interested., although they do at least feed my insanity with appropriate birthday and Christmas gifts! 💂♂️
ReplyDeleteYup the lad is interested in all things military…but he frequently forgets my birthday…so I’m not sure which of us is the better off overall? lol.
DeleteThis comment has been removed by the author.
DeleteA great looking game Mark and glad the rules are coming along nicely:).
ReplyDeleteCheers Steve - they’re coming along too well to be honest. I’ve no doubt a massive flaw will reveal itself shortly - if history is anything to go by!
DeleteNice little AAR. I'm glad the rules are working out for you. and the whole set up is rather pretty.
ReplyDelete😁
Thanks Stew. I do like everything to look neat and tidy.
DeleteA cracking game win or lose JBM….
ReplyDeleteI always enjoy the neat and tidy aesthetic of your games and I don’t mind the counters… In fact I think they add to it…
All the best. Aly
Thanks Aly, the counters are a bit OCD but I’m getting worryingly forgetful these days so anything that can help me avoid missing something important is a bonus!
DeleteWell. 'some you lose', 'it's the taking part' , etc etc - which doesn't make you feel any better, I suspect! Very nice looking setup; it looks like about 12 hexes wide and deep, and I am guessing Hexon 100mm hexes? Very do-able especially in 6mm. Rules clearly working well too, I like the morale states idea - and the names for the different levels!
ReplyDeleteThanks David, I don’t really mind losing to be honest it’s become a bit of a running joke here at Chateau Broom. Yeah it’s Hexon like you say and I use it as often as I can for all sorts of scales and genres. I use the blue for sea games usually and the black for space ones. Very versatile. I should be on commission. lol.
DeleteAs you have probably seen from my solo pike and shot games, I'm a fan of markers. It isn't aesthetically pleasing but it does stop me forgetting things like unit status and mandatory actions. The AAR reads nicely, made perfect sense and kept me entertained plus the table and troops look really nice. WoTR is one of those periods where my heart says ohhh lets do that, while my wallet whimpers quietly in the corner. I'm not getting any younger and I tend to have to think long and hard before a new period is leapt into. I'm already planning 2mm ancients using Strength and Honour and Antonine Miniatures blocks.
ReplyDeleteThe rules seem to be coming along nicely too. You are dealing with two of my personal bugbears in your rules, both revolving around randomness. Command and control, and troop quality, in ways that which I like. Personally I might make troop quality even more random but with a mechanism to have a general boost the quality of units pre battle (the good generals recruit better troops factor) and make command points slightly less random so a general has a base line number of command points and adds (or perhaps subtracts) a random number of points each turn. I'd perhaps think about limiting the number of times archers can shoot. A good longbowman could fire off a huge number of arrows in a very short space of time burning through the supply before you know it. That would force choices about who to shoot and for how long. But you know me I can't resist adding chrome to rules need it or not!
Hi Dave, I’m not a wealthy guy and I actually want to play large scale battles (rather than wait umpteen years to laboriously collect and paint several battalions of 28mm troops - that I’ll have lost interest in before I’m finished) - so the only way to achieve that these days is to go with the smaller scales. Counters are a necessary evil like you say - but I do try to keep them to a minimum by abstracting so much that things don’t need recording in the first place. You actually raise several good potential amendments that I think I should probably explore, namely the volume of missile fire and finding a mechanism to even out any wild command point swings. I don’t think we can count either of these as unnecessary chrome - so thanks for the input. Archer arrow supply does already exist as a thing but we only saw one minor instance of it in game, and the ability to boost a morale state exists as well, but in the heat of battle and documenting things I forgot to try it out! lol. Cheers for the valuable comments and good luck with strength and honour. I look forward to seeing what you do with it.
ReplyDelete