Saturday, 23 November 2024

Hwæt

Okay so this post is not intended in anyway as a review of Age of Penda…but it sort of is.

I bought the Age of Penda Rules by Daniel Mersey because they went along with a lovely range of Copplestone sculpted 18mm miniatures (available from Northstar) and the rules didn’t cost a lot extra. In for a penny and all that.

Now I’ve never had a bad set of rules from Mr Mersey but these looked VERY different and the first time I saw the pre plotted actions section I thought oh God no it’s going to be some sort of SAGA knock off. 

Let me assure you the Age of Penda rules are very far from that. 

For average commanders you get to pick 4 actions for your force per turn, each player taking it in turns to choose one from a suite of options. Once chosen you can use them in any order you want and one unit could perform all of the actions you chose in one turn if that’s your fancy. There is a subtle degree of strategy involved since once an action has been marked by a player it is blocked to his opponent. Reckon you’re about to get pelted by skirmishers? Choose the “shoot” action if you can and deny it to the enemy! I would go so far as to say there’s even a faint whiff of chess about it. 

I’m not going to laboriously go through a game turn by turn, but here are a few sample pictures taken from a recent testing sesh which might help illuminate a couple of points. 

Gratuitous eye candy shot of the 18mm lads in action.

The tactics chart. Both commanders were average so get to place 4 counters each, one at a time. Initially the red player rolled highest on a 1D6 so got to choose a tactic first. They chose “seize the initiative” which means they get to choose a tactic first in the next turn with no die roll off  - the down side being that only leaves three actions to use for their force. The “special tactics” box has a suite of associated actions to pick from (the paper on the left), but you don’t have to commit to what the chosen action will be until the moment you play it. 

For his first turn the red player selects “special tactics” and chooses “rush” which allows him to move mounted or skirmish units up to two hexes rather than the usual one. Red’s skirmish units move into the trees.

The green player uses “move” to hustle forward two units of armoured warriors to contest the woods. A chosen tactic is applied to all friendly units in an area, but only three units of any type from either side may occupy an area at one time.

The results of the warrior / skirmishers clash were that the attacking warriors took one hit and the skirmishers two. The dice strengths do not directly relate to the number of men killed but are rather a reflection of the units fighting ability - which can, handily, be rallied back if you’re lucky. 

About a turn or so later the skirmishers have retired and rallied back their strength. The red players three big blocks of armoured warriors advance far enough to potentially move into green’s square so their special tactic was used to form a shieldwall. A shieldwall only lasts for the turn but I made a crappy marker out of unused mdf bases and green stuff as you can see as an aide mémoire.

Ignoring the shieldwall red’s units enter the green leaders square and a huge old bucket of dice is rolled - needing 4, 5 or 6’s for a hit. I won’t bore you with the outcome. 

If you’ve limited space a moderate budget and an interest in gaming this period I would highly recommend these rules. Take it from me as an early medieval / dark age nerd. 

If you want to know how much of a nerd, here are some period related books in my library. 

Proof of nerdiness - should proof be needed.

Two tomes that are highly recommended for anyone interested in the nuts and bolts of fighting in this period.

Lair of the uber nerd. Learning to read and speak olde englisc is not necessary - but I went there anyway. The devil finds work for idle hands to do. lol. 

Till next time gesithas!


Saturday, 16 November 2024

Finished!


I’ve been slaving away at the work bench for a couple of weeks now (in between getting my ass handed to me in a couple of remote zoom games) but project Wiglaf is now finally complete. 

Well as finished as any project ever is…

All the miniatures I need for two opposing forces (the curse of the solo gamer) are painted and based…and the unusual off set square playing area has been cobbled together from foam board and off cuts of old battle mat (waste not want not). 

The figures are part of a range created by Daniel Mersey in 18mm and they depict warriors from the warring factions in 7th century Britain. I’ve gone with Christian Northumbrians versus Pagan Mercians. 

The rules that go with them seem like a cross between Dux Belorum and Saga, (but without the quirky special attributes or funky dice of Saga) and they are novel enough to have really caught my interest.

Something that I threw together over the weekend. Like you do. Shame I couldn’t be arsed to move the sea cloth from under it. Lazy is as lazy does.

I suspect that I’ll have a quick go at playing this next week, so a batrep will be forthcoming shortly. Ironically I seem to recall giving up on this project because I felt I wouldn’t have enough room to play it, though it transpires that with 12cm squares it would fit nicely on anyone’s kitchen table. lol. 

« All your base are belong to us » Apologies to readers over 65 or younger than 50 who won’t get the reference, but for those with an inquiring mind it’s an early internet meme. As you can see I might be 61 but I’m still down with the kidz. Apparently the internet is on computers now!

The next post will be the second battle in my naval campaign - but the planning and research for an Indian mutiny collection in 28mm have now begun in earnest - since The Current Mrs Broom claims to have spent a large chunk of my grandchildren’s inheritance on a metric ton of Empress Miniatures as an Xmas prezzie. 

Woo hoo! 

Miles better than some socks and a bottle of Old Spice I reckon. 

I hope Santa doesn’t bend their bayonets coming down the chimney.

Anywhoo…

Tarrarabit arr kid - as they used to say in Brum.


Saturday, 2 November 2024

Further goings on at Maison Broom.

Bugger me it’s November already. Where the hell did October go? All the leaves are off the fruit trees and we are down to 1 egg a day so it’s definitely autumn despite the sunshine.

Although I’ve another naval game in the pipeline I thought I’d take the opportunity to bring you up to speed with matters military here at La Maison Broom. 

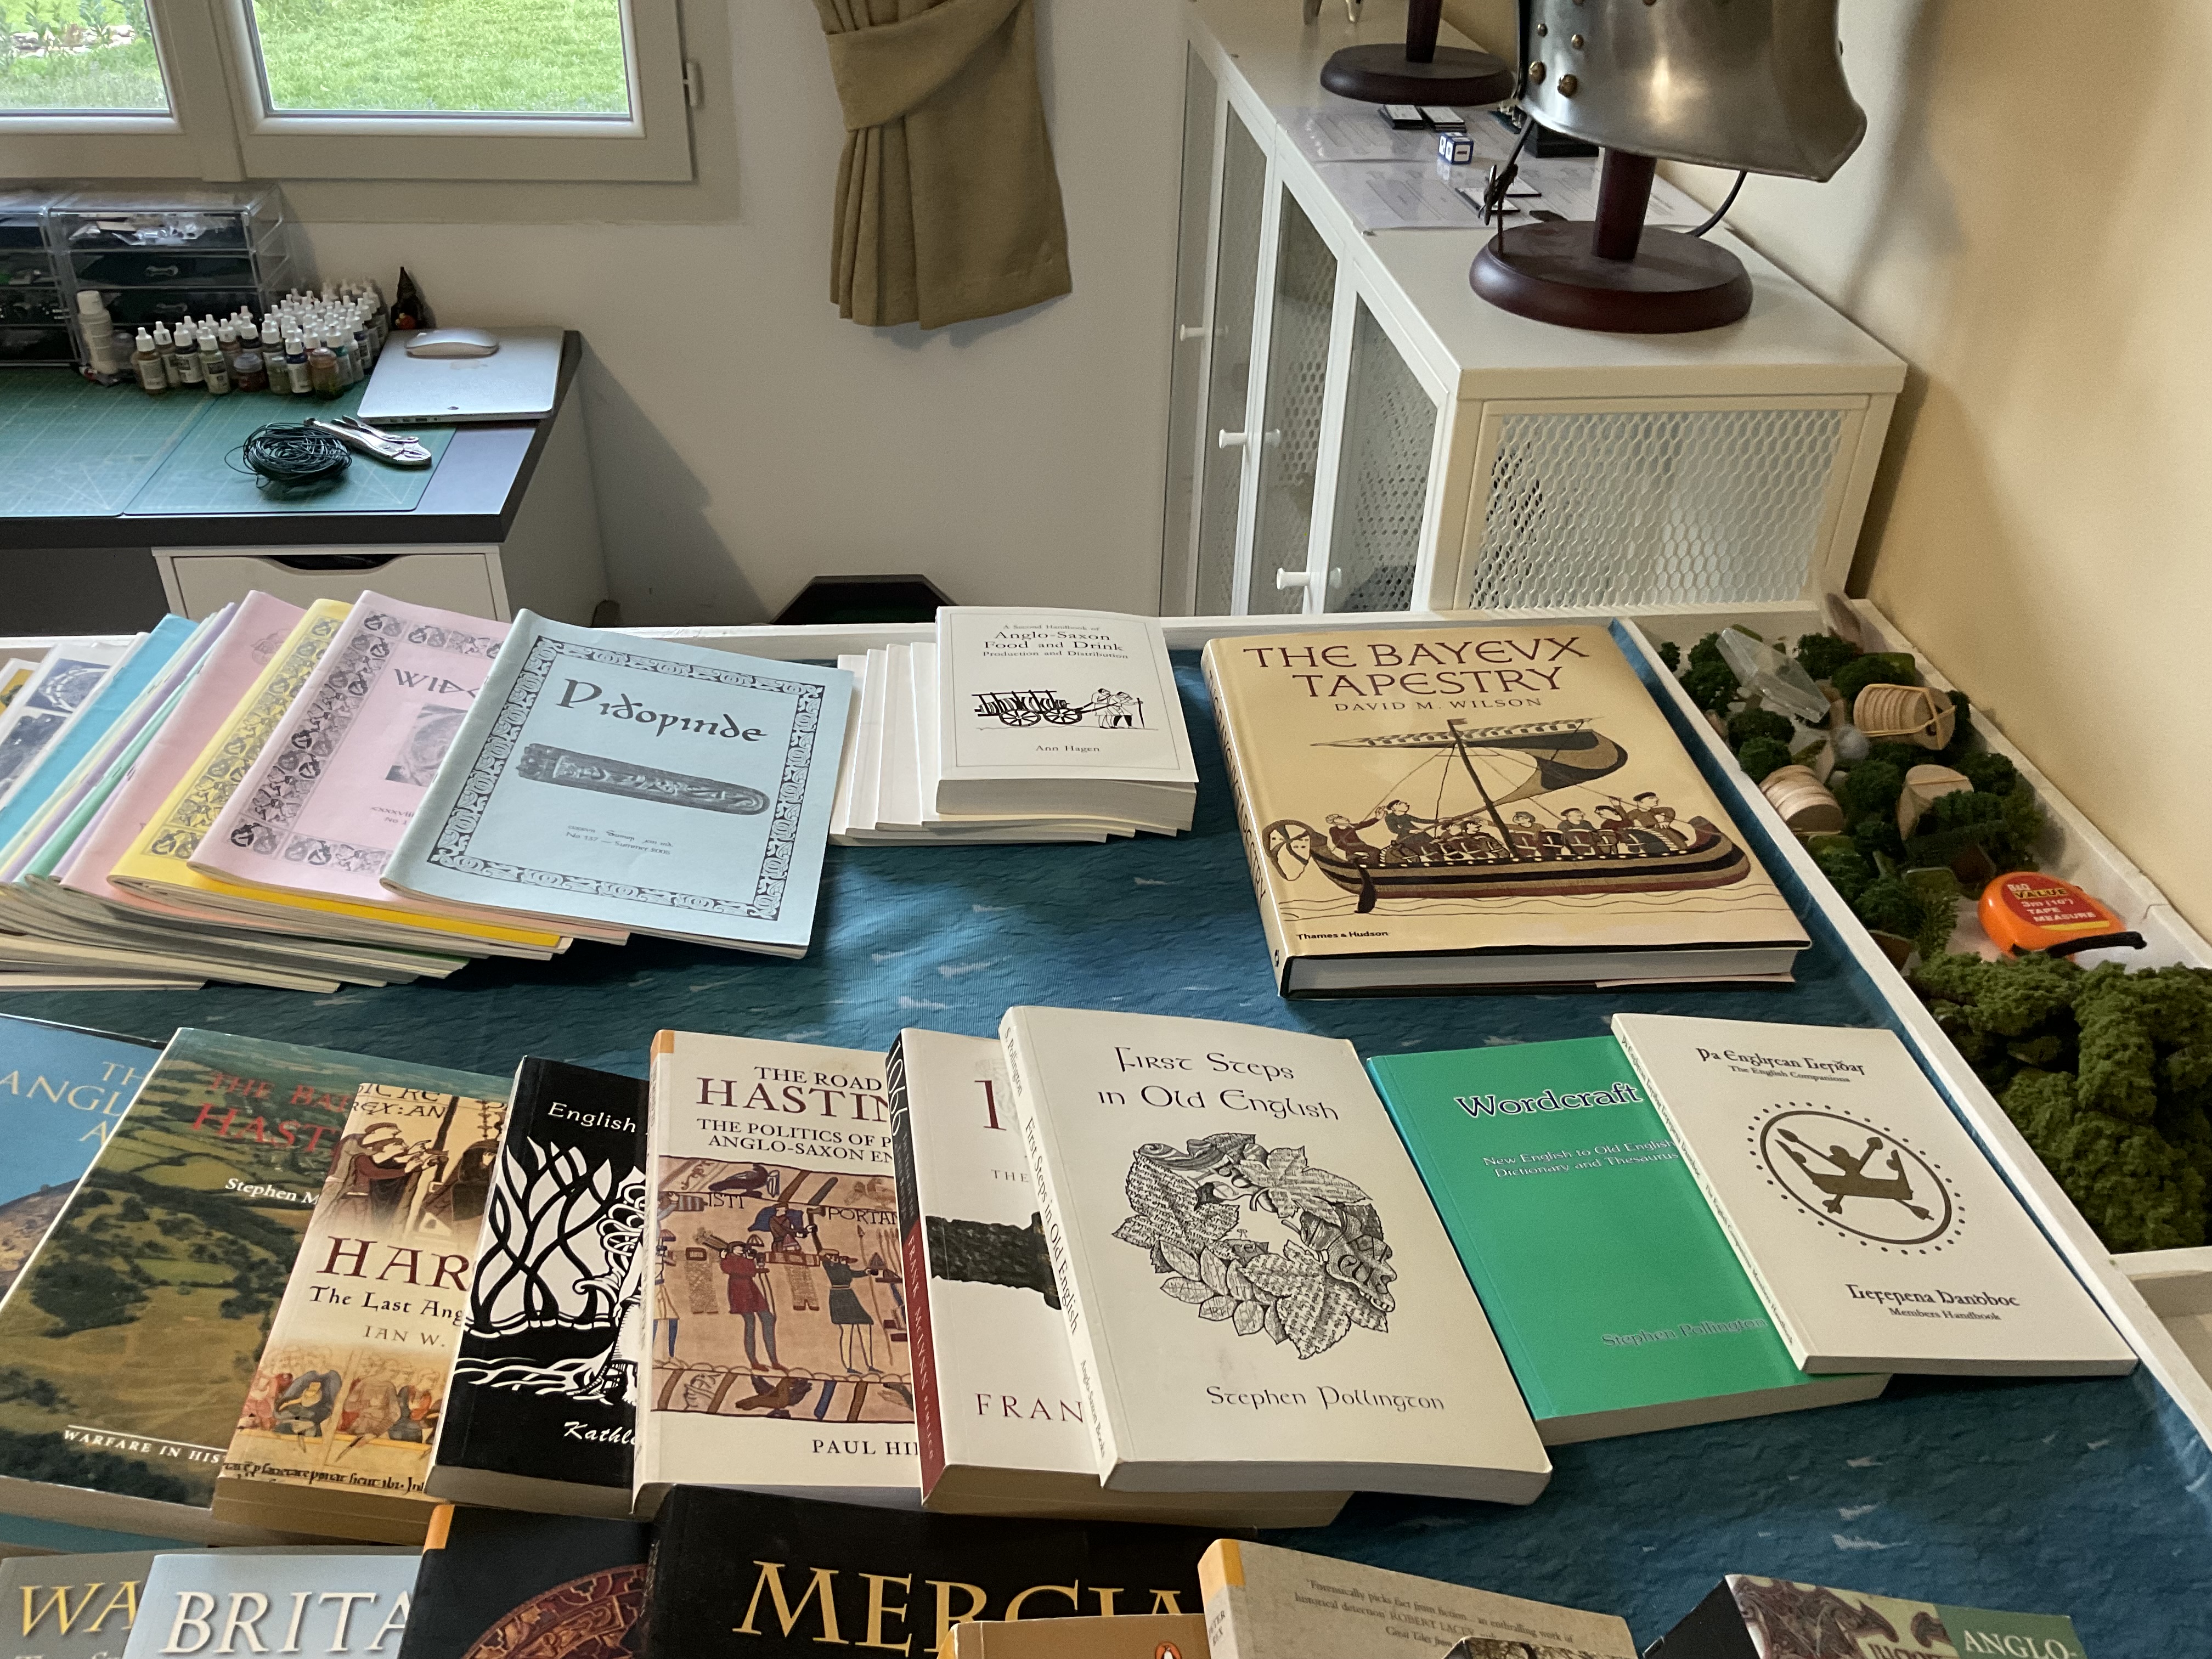
First off, my recent dive into the depths of the lead pile unearthed a little treasure trove of Wiglaf miniatures 18mm Saxons.  I’ve been painting away like a busy little squirrel ever since and this is where we are so far.

7th century Saxons in 18mm - discovered hiding in the lead pile.


The plusses are that I already have the terrain and the rules to use with these chaps, so apart from a few more packs of personality figures I should be good to go. The minuses are that I discovered Kalistra 10mm Romans lurking in the lead pile while digging as well. I had hoped to order some of the 3d printed ones recently showcased by Keith on his Bydand blog - but the Kalistra lads are already here so it makes more sense to persevere with them I suppose.

This latest scouring of the lead pile has made me realise how fixated on a project I can become, and also how quickly this  then seems to turn into a form of burnout and disinterest. 

What I need to do (and I’m sure the Current Mrs Broom was referring to my wargaming when I went up to bed the other night) is to spice things up a bit ;-). You know the drill, different scales, different periods, go where angels fear to tread and all that. Maybe try and have more than one project on the go that I can flip back and forth to.

Maybe, oh I don’t know, something like…this…


Or this…


Empress Miniatures 28mm Indian Mutiny range

Oh my God they look so good…

Of course it’d mean all new terrain and the figures are ruddy expensive but I’ve got a set of rules to use, so there’s that. I mean okay so I’ve been trying to cut costs, but for gods sake I could be run over by the bus tomorrow and have never even tried these. 

It’d mean a move towards skirmish gaming with The Men Who Would Be Kings and no hexes but it’d snap me out of my “I’ve got no room for gaming so I’ll only buy small minis,” rut.

Nah. 

Cmon. It makes no sense at all. What am I thinking?

But they do look soooooo good…don’t they?

Okay, enough with the levity and the ho ho ho’s. 

As you may recall I had the summer off from blogging in order to recharge the old batteries. It involved a fair amount of time with chickens (anytime spent with chickens is time well spent, trust me) but I also went for a wander or two around the outskirts of my hamlets parent village (St Dizier Leyrenne - yeah you can google earth it if you like, it’s not like I’m going to know, now is it?). 

It was July 19th and I was nearing the end of a pleasant stroll through the woods when I came across this.


And just like that I fell down the local history research rabbit hole that I referred to a couple of posts ago.

By mid 1944 the German army had been bled white. The units left “occupying” France were by and large a hodgepodge of signal troops, SD, Gestapo, recuperating units from the eastern front and so on. You get the drift. 

Just after the invasion, orders were received to begin an anti partisan sweep in my department. Despite the supply and man power problems experienced by the Wehrmacht, 2500 troops, 110 vehicles and 7 “cannon” were formed into Brigade Jesser, and this caravan of retribution then burned and looted its way through my local area for about 2 months

On  16th July 1944 they arrived at the entrance to Bourganeuf, which is my nearest town. Here they were confronted by Capitaine Jaques Chapou and elements of his CFI partisan group. 

According to locals Capitaine Chapou was shot here on the approach to the town while preparing an ambush, and a number of his  men were duly captured. Zee Germans would have been approaching from the top of the picture.

Given the numbers involved the partisans were soon overwhelmed with the Capitaine going down in a hail of fire. 12 resistance fighters were captured and imprisoned in the Zizim tower until the follow up SD units could arrive. The official version is that these men were deported to Germany - though none were ever seen again. 

The tower of Zizim in the town square - left of picture. Built in the 15th century to house a captive Ottoman prince. You know… like you do. 

The Rue de Verdun was sealed off at both ends and families dragged out into the street to be searched and generally roughed up. My neighbour Solange was only 9 at the time and she still remembers it well. I guess you would.  

Rue de Verdun - then

And now…

On the 19th July Brigade Jesser arrived in my little hamlets parent village (St Dizier Leyrenne) with over 40 trucks parking on the village green pictured below. 

The 1944 Saint Dizier Leyrenne truck stop.

The accompanying SD detachment set themselves up in front of the monument slightly to the left of the picture and began their interrogations. There were less than 500 people resident in the village and surrounding farms. 61 people (apparently selected at random) were arrested and deported to the Reich for further investigation. Only 2 returned after the war. 

I can only assume that the interrogators from the SD were fairly efficient because somehow later that evening a company of soldiers surrounded 8 of Capitaine Chapou’s partisans who’d avoided the roundup in Bourganeuf and were attempting to escape the area through the woods to the north of my house. 

The soldiers involved were Crimean Tartar “volunteers” in the Russian legion and they brought with them all the excesses and barbarism of the Eastern Front. The 8 partisans were captured, tortured for information and then executed on the spot. 

Crimean Tartars of the Russian Volunteer LegIon in France 1944]

So yeah, it was exactly 80 years later to the day, on the 19th July 2024 that I was wandering through the nearby woods and I discovered the memorial. I was alone and the woods were silent. It all felt very sad. Apparently there are flowers left each year. Next year I shall add to them. 

Some of the Tartars responsible for this outrage mutinied on the 29th July and actually, while out of my area, volunteered to join a resistance group in the Corrèze region. Their fate after this point remains unknown. The rest of the unit eventually met their end in the Colmar pocket. 

Kurt Jesser was captured in October 1945 and held in a camp to be charged for war crimes. He was released in 1947 and all charges were dropped. A further investigation was launched in 1949 (perhaps when further information came to light?) but again the charges were dropped. He died at home in 1950.

Now, if you want “grim” on a larger and even more barbaric scale try googling Oradour Sur Glane which is also not too far away and well worth a visit. 

Toodleooh.


Saturday, 26 October 2024

Shots fired!


After a few sessions of F2F testing against Jérémie it’ll come as no surprise to anyone that I dropped the flag orders portion of my homebrew naval rule set. They looked nice, they worked okay (ish) but they added extra and unnecessary “chrome” that the game seems none the worse without. I’m sure that most of those who write their own rules will have experienced something similar at one time or another.

Since everything else seemed ticketyboo and was explainable to a Frenchman (through the medium of dance when my French failed me) I’ve moved forward with my alt history Mediterranean naval campaign.

For those who can’t recall the setting and are too lazy to go back a post, the French and the Austrians have had a fallout over France’s attempt to control Morocco. Supporting Germany’s secret plan to provide troops for the Sultan’s defence an Austrian troop transport hits a mine and is lost with all hands. Shortly after and perhaps in retaliation a French merchant ship disappears off the coast of Albania.

Both sides demand satisfaction and the calling of a second international convention to arbitrate the matter. Unfortunately, before the convention can be arranged the French navy begins boarding and searching Austrian flagged merchant ships in Moroccan waters.

Naturally it didn’t take too long for the Austrians to start organising convoys and adding escorts to deter the French, and equally naturally it didn’t take long before a miscalculation saw shots fired. 

Wounded national pride meant that damage to two Austrian escort cruisers could not go unanswered and all thoughts of an international convention were kicked into the long grass as we start this campaign in July 1906 with the following fleet action plans.

My acme mission planner. French on the left, Austrians on the right. Opposed missions call for a battle to be fought and victory points to be won as a result of the outcome. Vessels from the opposing fleets are assigned to different tasks. I chose the French ones but the Austrian ones were done by random dice roll. This represents a month of “in game” conflict. First up (though they could be done in any order) was a coastal defence versus shore bombardment encounter.

Shore Bombardment vs Coastal Defence 

Austria has opted to “send a message” by shelling a largely unpopulated  area of French Corsica with two major warships. The battleship Habsburg and the Armoured Cruiser Kaiser Karl VI approach the coast which unknown to them is being patrolled by three Motor Torpedo Boats (Tempête, Orage and Cyclone). 

Three French Torpedo Boats on patrol. Each hex has a stacking capacity which is not related to vessel size but to the sea room required to safely travel and manoeuvre without fear of collision. 3 Torpedo Boats can share a hex, 2 Destroyers and only 1 Battleship or Cruiser. Ships that share a hex are always counted as being in formation (which brings combat benefits) but they also make a concentrated target for enemy gun or torpedo attack.

The mission occurs in calm seas with good visibility (the Torpedo Boats would have had to return to port if rough seas had been rolled for) and one side of the board is designated as coastline. The bigger Austrian ships stand a chance of running aground if they get too close to the shallows but their mission is to get within the 8 hex range of their main guns and fire off three salvoes into French territory. 

Ship data tiles for both sides on Turn 2. The Austrians hold the initiative (higher score on the black dice). The red dots denote which of the vessels on either side are the lead ship and the red ❌ is a notification that the Austrians have spotted the patrolling Torpedo Boats, while the French still remain ignorant of the Austrians. Until an opponent has been spotted no firing or changing of course is allowed.

Enemy coast ahead! The Habsburg engages the Torpedo Boats with its heavy guns. Until this point the French, who had still not spotted the Austrians, were doomed to continue pootling ahead at the same course and speed. The water spout thrown up by the first Austrian shells soon changes all of that. (A firing fleet automatically gives away its presence). Only a vessels heavy guns produce the water splashes, which, while on the board add a positive modifier to any other heavy gun shelling from other ships. Medium and light gun batteries have shorter ranges and fire in a flatter trajectory so don’t produce them. In this case the forward guns of the Kaiser Karl VI cannot fire because the Habsburg is in its line of sight and arc of fire. The Habsburg missed but because of the French ships close proximity to each other diced to see if it hit one of the others instead. Dammit…Missed again. It wasn’t to be the Austrians day.


Sacré Bleu!


The Torpedo Boats split up and go to full speed, (3 hexes) approaching the Austrian interlopers from different angles. The Habsburg fires its light gun batteries at the closest one and misses but the Kaiser Karl uses its medium guns and inflicts a hit on the Orage’s steering. The Torpedo Boat cannot change direction now until the steering mechanism is fixed (one of only two damage types fixable at sea) but she can only take two pieces of damage in total before sinking so she’s already half way there.


By turn 4 the Orage has rigged a temporary rudder repair but her sister ships have now closed in on the bigger vessels and as one they launch their torpedos.

At such close range the torpedoes hit on a roll of 4, 5 or 6. Each successful torpedo salvo calls for three damage dice rolls. The results are pretty serious, but not yet deadly. The Habsburg is on fire, has had its speed reduced to half through propulsion damage and its rudder is jammed. The Kaiser Karl avoids a fire but a number of its gun mounts have been damaged (reducing its fire accuracy) and it too is having propulsion and steering problems. 


Here’s a close up of the ship data tiles. The yellow markers indicate that the Torpedo Boats have each fired one salvo of torpedoes (they only have two each). Damage to the Austrian ships is not critical but it triggers the fleets “bottle out” response. The two Austrian ships have a combined damage potential of 6+7 = 13. When greater than 50% of this value of damage has been inflicted across the fleet it must immediately attempt to withdraw from the battle. The kicker is that hits on the flagship count as double so here the Austrians have suffered 9 points of damage - and must attempt to withdraw via the nearest board edge.


During the next two turns both of the Austrian ships manage to repair their steering and the crew of the Habsburg manage to put out the fires before they reached the ships magazine. (2 fire hits present at one time = kaboom). Still struggling along at half speed they turn for home, exchanging ineffective light gun fire with the Torpedo Boats at close range. 

Ignoring the sporadic and inaccurate gunfire from the Kaiser Karl the Tempête closes again to launch its last torpedo salvo - with devastating results. 


This time the hits on the Kaiser Karl are terminal and she rolls over and sinks with huge loss of life.


The Kaiser Karl’s damage capacity is maxed out and she sinks.


Fleeing for the safety of the board edge the Habsburg lashes out with her light and medium batteries causing waterline and armament hits on two of the pursuing Torpedo Boats. With 3 hits out of 6 between them, the French boats have also reached their bottle out level and they break off the action and head for port.


I think I can safely chalk this game up as a French win which’ll score them 5 campaign points. With only 1 damage counter each the Torpedo Boats will be repairable within this 1 month window and available for missions in August. The Habsburg will make it home at half speed and will also during the month be repaired in time for actions in August. I suspect that the Captain will face an enquiry if not for the outcome then for not attempting to rescue the Kaiser Karl survivors!

Observations.

The Austrian ships were more heavily armed but slower and less manoeuvrable than the tiny French Torpedo Boats and this advantage allowed the French boats to press home their attacks  with their very destructive torpedoes. The bottle out mechanism allowed for a realistic “time to get out of Dodge” moment for both fleets so that was all good too.

The failures, if failure they were, were out of the players hands. Anything but a calm weather environment roll would have forced the Torpedo Boats back to port before any combat, thereby ceding the game and the mission to the Austrians. 

The Austrian decision to attack the French at long range alerted them to their presence. It’s unlikely the French boats would have just continued sailing along in ignorance until they left the board but if they had this would again have ceded the game to the Austrians. 

A better die roll on the initial Austrian fire could have caused significant damage if it had hit, which would have altered the dynamic of the encounter at a stroke. 

The assignment of vessels to missions by random die roll put the Austrians in an awkward spot. Attacking in daylight with two capital ships, unsupported by light screening vessels was a choice no competent Admiral should ever take. Another reason for a board of enquiry methinks!

All in all I was well chuffed. The game took 10 turns to complete and the playing time was a mere 50 minutes. 

Hopefully I’ll have some wreck markers made before the next mission. 

I appreciate that most of this blogs followers are not “naval types” but cheers if you’ve read this far. Take comfort that there’ll be a land based post coming up before the next maritime excursion.

Toodleooh. 

Monday, 14 October 2024

So I went looking for trouble…

I needed a reason for Austrian and French fleets to clash before the First World War, something historic and plausible if possible, a factual jumping off point for a little naval campaign based in the Mediterranean and, given the ships I possess, circa 1906 / 07 ish. 

Fortunately the major powers around that period were forever getting up in each others grills and I quickly found just the thing.

You might want to go and have a look at the Tangier crisis on Google (other search engines are available)… but if (most likely) you just can’t be arsed to do that, I’ve listed the essential highlights below.

a) 1904 - Britain and France sign the Entente Cordiale - Germany is mightily pissed off.

b) 1905 - France continues to expand its influence in North Africa, focussing on making Morocco a protectorate.

c) 1905 - 1906 Pissed off germany does a bit of meddling. The Kaiser goes to meet Sultan Abdelaziz assuring him of German help to maintain Morocco’s independence. Sabres are rattled.

d) 1906 - An international conference is called to settle the matter. Britain, Spain and Italy side with France. Only Austria Hungary sides with Germany. The Germans are told to back off and mind their own beeswax. The Kaiser is humiliated.

So naturally that wasn’t actually the end of the matter…and it sort of rumbled on in a very low key manner until a second crisis occurred in 1911, but for now 1907 will serve as my campaign jumping off point.

So here’s the alt history bit to hang my new campaign on.

e) Following the conference a humiliated Kaiser begins secretly shipping weapons and “advisors” to Morocco via his supporters in the Austro Hungarian government. Wilhelm is not terribly concerned about Morocco in itself, of course, but in the right hands he hopes the weapons will fuel an insurgency that would be embarrassing and costly to France.

f) June 1907. The Austro Hungarian registered SS Amstetten strikes a mine while entering the port of Nador and is lost with all hands. Arms and amunition are recovered from the wreckage. 

g) Austria Hungary blames France for the sinking and demands reparations. France accuses Austria Hungary of attempting to destabilise Morocco, and threatens military action.

h) Germany comes out in support of Austria Hungary but Britain orders its Navy to readiness and the Kaiser backs away, washing his hands of the affair and leaving Austria Hungary to carry the can. 

i) A French Coaster, the Isle de Maran, goes missing in clear weather while en route to Le Souqet. 

j) Elements of the French and Austrian navies put to sea, intent on seeking redress.

The campaign will have strategic turns lasting a month (in game time) in which the players will assign their available vessels to a series of mission types conducted in unspecified geographical locations (look ma no maps). The French have more ships available than the Austro Hungarians but the latter fleet has a minor qualitative edge. Many of the French ships are Protected Cruisers for instance, having a fraction of the armour that the Austro Hungarian Armoured Cruisers have.

The French vessels initially available are:

Hoche - Battleship

Bouvet - Battleship

Charles Martel - Battleship

Galilee - Protected Cruiser

Linois - Protected Cruiser

D’ Entrecasteaux - Protected Cruiser

Friant - Protected Cruiser

Amiral Cecille - Protected Cruiser

Cyclone - Torpedo Boat

Tempête - Torpedo Boat

Ourage - Torpedo Boat

Coming into the region from other deployments are the Armoured Cruiser Bruix, 2 x Light Cruisers and 6 x Destroyers.

The Austro Hungarian ships are:

SMS Habsburg - Battleship

SMS Marie Theresa - Armoured Cruiser

SMS Sankt Georg - Armoured Cruiser 

SMS Kaiser Karl VI - Armoured Cruiser

SMS Zenta - Protected Cruiser

SMS Huszar - Destroyer

SMS Ulan - Destroyer

SMS Tural - Destroyer

In reserve they have the Battleship Wien and the Armored Cruiser Kaiser Franz Josef.

Any number of vessels may be assigned to one or more of the missions shown in the last piccie below, but the players assign them in initial ignorance of their opponents assignments.

Once the two deployments are complete the planning forms are placed next to each other. Where two missions are found to be in opposition a battle will occur. The winner of a battle is awarded 5 victory points. 

Once all battles have been resolved a cessation of hostilities check is taken, wherein the damage sustained to each fleet and the number of victory points accrued will be influencing factors. 

I will use my own set of rules because I’m eager to try them out, (they’ve been sitting on the shelf since 2021) though I am in possession of several other excellent sets that I intend to try out as well in the near future. 

Here are a few piccies relating to my rules, taken during a recent play test - which may stimulate comments (good or bad).

The battleship Habsburg comes under long range heavy gunfire. A six is required on a 1D6 to score a hit, but any miss causes a splash marker that adds +1 to any other heavy guns attacks (while the marker remains in place).

For every hit on a target with medium and light guns you roll one of these dice. Heavy guns roll 2.  The icons indicate what has been hit and as you can see here, we have both guns and armour strikes. In case you were wondering they’re just icons stolen off the interweb printed out and stuck on blank dice. Simples.

Each ship has a data “tile” held off board to record damage with markers. The Jaureguiberry shown here can take 7 hit markers before she’s lost but the individual hit markers also have secondary effects. This French battleship is taking on water from a hull hit, has lost steering and is currently on fire. A second fire inflicted on her while this one is still in being will result in a magazine explosion. The quality of the markers is poor but I resisted the urge to get “too frilly” until I’ve worked out if any changes need to be made.

Orders are issued from the squadrons flagship to subordinate groupings of vessels (divisions) in the form of flags placed next to the vessel data tiles (I hate clutter on the table). Only one order can be changed per turn - so you need to think ahead. 

Flag type order counters made out of MS Word symbols and stuck onto spare mdf bases.

Flag code books. There are three in existence for a player to choose from - pre game. The orders are standard on all of them but the colour and number of the flags is different - which stops you from knowing what the opposing admiral has just ordered his fleet to do.

Here are two divisons of a French naval squadron with their current orders on display. One is in line astern and firing at long range, the other is in line abreast (on the board) and ordered to close and engage. Orders are changed 1 at a time and can be removed or added to.

And finally… Not very exciting to look at but key to the campaign. Both players assign their available vessels to the missions in the boxes then bring the two sheets together to see which of the missions they have chosen have been opposed. Opposed missions result in a battle. The mission types include blockade, coastal bombardment, sea lane patrol, blockade runner, coastal defence patrol and merchant ship escort.


I’ve playtested the rules a few times in the last couple of weeks but I’m pretty sure the forthcoming campaign will reveal holes in the logic at some point. All part of the fun I suppose. 

Toodleooh.


Friday, 11 October 2024

Goings on at Maison Broom

Sometimes good things can come out of bad - which is an unusually glass half full kind of thing for me to find myself saying…but it’s true. 

See I’m a bit light on the whole hobby dosh thing at the mo (US TRANSLATION - I’m on skid row / I’m a bum and I ain’t got no money) since the wife’s 60th birthday and our 40th wedding anniversary will unfortunately not pay for themselves - and it’s forced me to delve deep into my lead pile of shame. 

Some of us accrue a lead pile with the certain knowledge that its contents will be turned into table ready masterpieces within a rigidly preplanned production schedule…(coughs)…isn’t that right Jon, while some of us without the gift of purpose and planning lose interest in a project almost as soon as the miniatures arrive - put off by the enormity of the task that suddenly lies ahead. 

You can guess which category I fall into. 

After a while the lack of any finished product from such profuse and carefree spending becomes a matter of internal guilt and shame - definitely something to keep out of the view of curious wives and their desire to establish “how much did all this lot cost, then”. As a direct consequence of all this - for the last two years most of the East Midland’s chief export has resided in my special cupboard of mystery - to which only I have the key.

Working on the assumption that I must have seen something in these jolly little bags of lead at some point and baulking at the prospect of buying something new from my currently scant resources I resolved to dig deep into the pile to see if something within might be worth revisiting.

The first step was to isolate the still half finished stuff, with its accompanying taint of failure, (I’m looking at you Elizabethan 10mm) and make my way down to the deeper strata of things I don’t even remember buying and which, it seems, have never been touched. First out were some tripods from Tumbling Dice,  (I know, I know…always with the Victorian sci fi…what is it with me and that sort of stuff ?) models which look much nicer than the scratch built ones I cobbled together over the summer and probably require early deployment.

Tumbling Dice Tripods - with wavy tentacle additions by moi and some blurry 2mm infantry both for scale and potential opposition. FYI the left most one is sort of crouching down menacingly.


At the same semi Carboniferous level were other goodies from TD - an entire project in fact - from a past fixation of mine that never left the planning stage. Until now.

I thought I couldn’t do stuff smaller than 2mm, but I was wrong. Welcome to the world of 1:2400 scale pre dreadnoughts. Ships designed, constructed and employed at the height of the belle époque.

I have two small fleets, one French one Austro Hungarian, a set of rules written years back and a sh*t ton (or its metric equivalent) of blue hexon tiles…so I think I’ll have at it. 

Waddya reckon? 


Austro Hugarians, led by the battleship Habsburg. Dead quick to paint up as you can tell. All the ship info is on the underside of the base since I find it more pleasing to the eye that way - flying in the face of convention I know, but hey don’t box me in with all your rules daddyo.


Amiral Cecile, Friant, Charles Martel and 3 Jeune École style torpedo boats - ready for action despite being in peace time colours. I suspect there’s going to be some trouble in the Mediterranean quite soon.


Two generic merchant ships. A troop transport and a collier. I took the lazy way out with the bases and sprayed them with a texture effect blue spray quite close in colour to the hexon tiles. Anything for an easy life.


It might get me out of playing against this guy for a while…


Major Clanger - views the battlefield at a recent 2mm refight of Cheriton inspired by Jon Freitag’s battle marathon over at Palouse Wargaming Journal. The Major (playing as the Paliamentarian faction) beat me handsomely. As usual. He’s done nothing but crow about it since.


Toodleooh.